[ad_1]
If you’re anything like me, you love sleeping in the great outdoors. The fresh air, the peace and quiet away from the hustle and bustle of society, the isolation, the aroma; I always sleep like a rock. In fact, maybe I sleep a little too good…
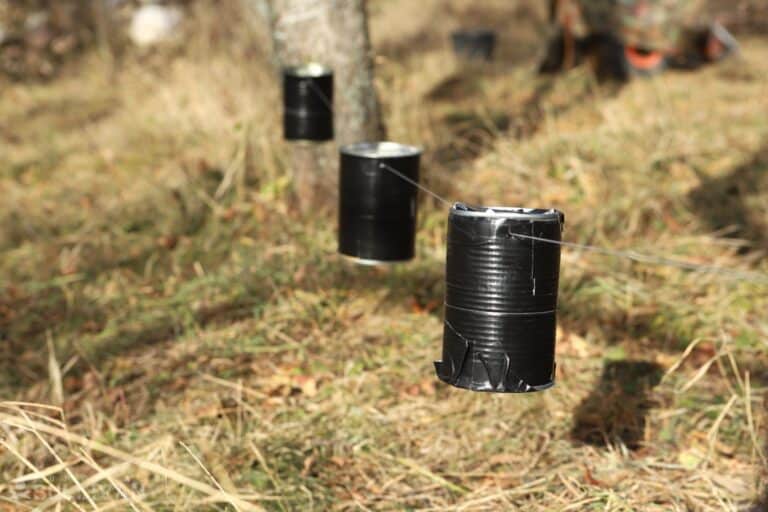
But whenever you’re sleeping outdoors, there is an element of vulnerability associated with it. You don’t have walls in a roof protecting you. An intruder won’t ostensibly have to make noise in order to reach you by breaking in. It’s enough to make you a little paranoid.
Luckily, there’s an old-school way to give yourself some early warning and a little bit of assurance when sleeping outdoors by crafting a perimeter alarm from common materials.
One classic variation uses nothing more than Paracord or fishing line and tin cans for the purpose. Keep reading and I’ll tell you how to make it so you can sleep without worry the next time you’re camping!
Men and Beasts Alike Can Threaten Sleepers in the Wild
Before you write this off as so much fantasy, consider the stakes when you are sleeping outside. Wherever in the world you are, and whatever you are doing out there, you’ll be vulnerable because of the sheer isolation and removal from society.
Worse yet, it’ll be dark, very dark, and if you sleep particularly soundly men and beasts alike can walk right up on your campsite, maybe even right up to your tent or sleeping bag, and you’ll be none the wiser. Sadly, there are plenty of tragedies that have befallen people camping out in the wilderness who were fast asleep.
From dangerous people to large predators like bears and mountain lions, it’s definitely worth your while to spend an extra couple of minutes setting up alarms on strategic approaches to your camp.
This design will help you do it with hardly any extra effort after you modify the materials, and it’s cheap insurance against anything that might go bump in the night when you are at your most vulnerable.
Even better, it’ll take you only the work of half an hour to modify the materials and will likely only cost you a few dollars total.
What You’ll Need
Your old-school tin can alarm needs little in the way of tools and materials, and chances are good you already have all of these items…
Tin Cans: as the name suggests, your alarm system will require tin cans to form part of the noise maker components. You can use any common, clean metal can of the kind used for food and other kitchen staples.
You want this to be metal, though, and preferably unlined so it’ll make as much noise as possible. You’ll need at least three for every alarm you want to create.
Can Opener: you will, of course, need something to open your cans so you can dump the contents and then clean them. I prefer a manual can opener for this so I have maximum control over the lid. You don’t want to remove the lid entirely!
Punch: use a nail, an awl, or any other kind of metallic punch that can pop a couple of small holes in each of your tin cans. Almost any pointed metal tool can do this, but think twice before using your knife unless you have no other choice because it’s a great way to damage the tip.
Marbles or Pebbles: the other things you’ll need to complete the noise maker component of the alarm. Glass marbles are the ideal noise maker and really do create a hell of a racket when your alarm is blundered into. Small, average-sized marbles are ideal.
Steel ball bearings are another viable option, but if you don’t have or don’t want to spend the money on marbles or ball bearings, common pebbles also work pretty well but they don’t clatter around as long or as reliably as marbles do.
If you’re going with pebbles, get small, uniform and smooth ones. Make sure they are clean as caked dirt and mud can deaden the sound.
Sand Paper (Optional): if you have a scrap piece of sandpaper handy, it will help to round off sharp edges on the cans that might snag your line or cut you.
Sturdy Paracord or Fishing Line: I found that the ideal kind of cordage to use for this trap is a fishing line. It seems to be significantly bouncier and more prone to snagging on passersby compared to paracord, and is certainly strong enough for the task.
It’s also very difficult to see at night! You can use paracord as an alternative, of course, or use actual trip line if you have some handy.
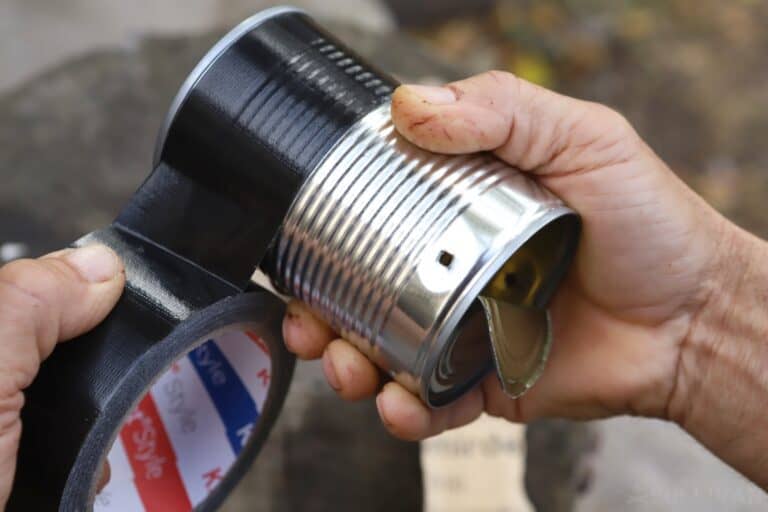
Drab Duct Tape: your tin cans are going to be shiny and easy to see glinting in the moonlight, so it’s in your best interest to darken them down by using any appropriately dark-colored duct tape. You won’t want to use silver, of course, but anything like black, dark earth, all of drab and so forth will be fine.
Metal Paint (Optional): if you really want to get fancy with your trap, consider painting the cleaned tin cans with matte finish spray paint to truly black them out and make them hard to notice. It makes a difference!
And that’s all you’ll need. With these supplies and few tools in hand, it’s time to get on to crafting the trap.
Making Your Tin Can Alarm, Step by Step
It’s not difficult to make a simple tin can perimeter alarm. The following steps will tell you how…
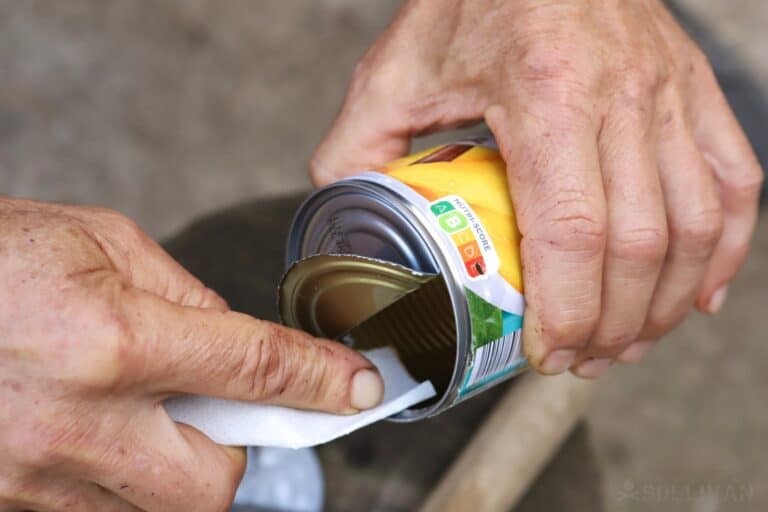
Step 1: open cans halfway. Assuming you’re starting with full cans of whatever, use your can opener to open them halfway.

Step 2: bend half of lid back. Use the tip of your punch, a knife, or any other convenient tool to lever the lid up.
Step 3: empty contents and clean. Whatever is in your cans, get it out of there and then thoroughly wash the cans so they don’t stink.

Step 4: punch holes. Using your punch, whatever that is, pop a small hole in each side of each can near the top, but not right at the edge so it doesn’t tear out. Make these holes in line with the crease in the lid.
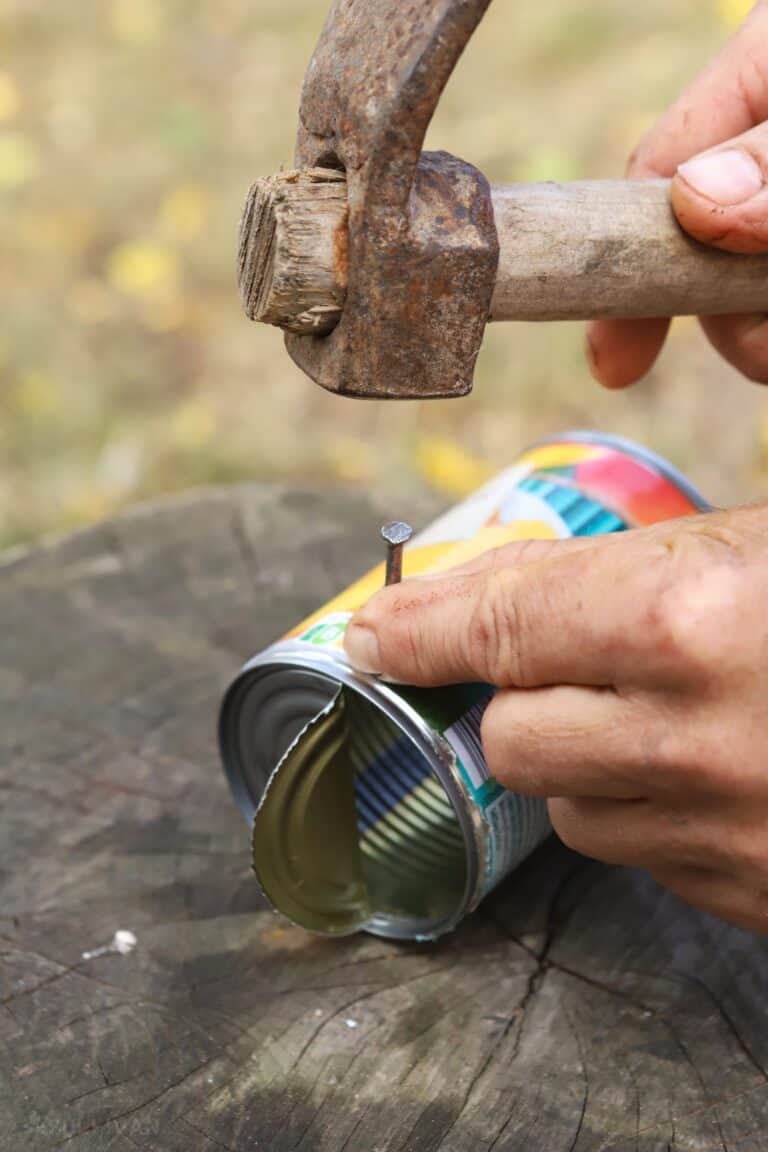
Step 5: sand edges. If you have sandpaper or a thin, round rat tail file, sand the edges of the holes you made, on the lid and on the rim. This will make it easier and safer for you to handle the cans, and also reduce the likelihood that the cans will break your fishing line.
Step 6: paint or wrap cans. Remove any labels that are on the cans and then use your duct tape to wrap all shiny metal surfaces on the outside. If you’re using paint, paint the cans and then let them dry before proceeding.
Step 7: measure fishing line. When it’s time to place your cans, you’ll need two anchor points on either side of the approach that you want to protect. Measure out your line so that it can be stretched mostly taut across the approach with enough left over on either end to securely anchor your alarm.
Step 8: thread cans onto line. Each approach should be protected by a line that has three cans on it for maximum racket and chances of disturbance. For very narrow approaches, you can use two or even one can. Space the cans so they are mostly equidistant from each other.
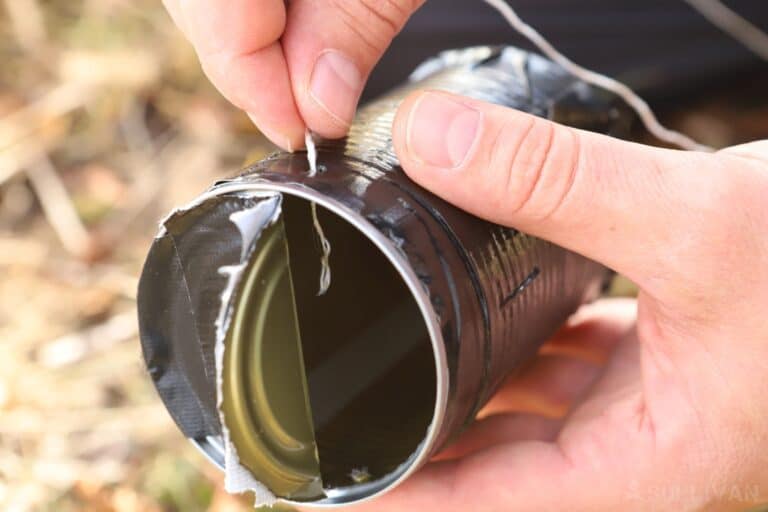
Step 9: secure fishing line. Anchor one end of your fishing line by tying it off. You’ll want your cans to be suspended 2 to 2 ½ feet off the ground, so choose your anchor point accordingly.
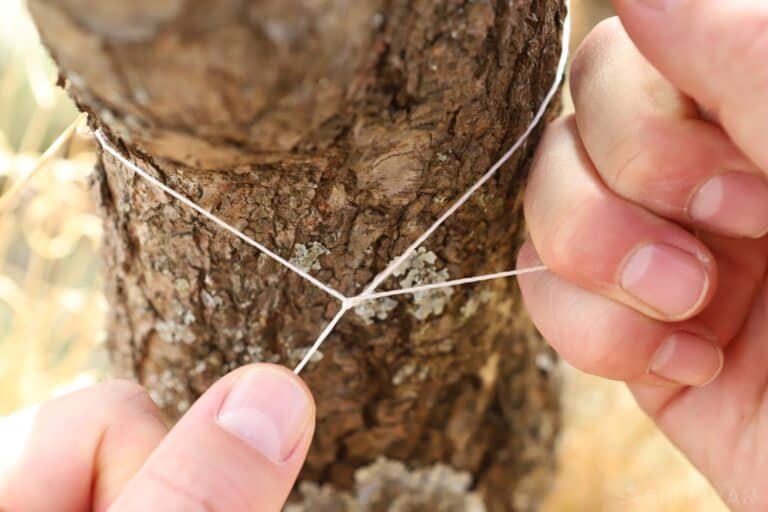
Step 10: load marbles. Load your marbles, ball bearings or pebbles into the cans. 4 to 6 is usually appropriate.
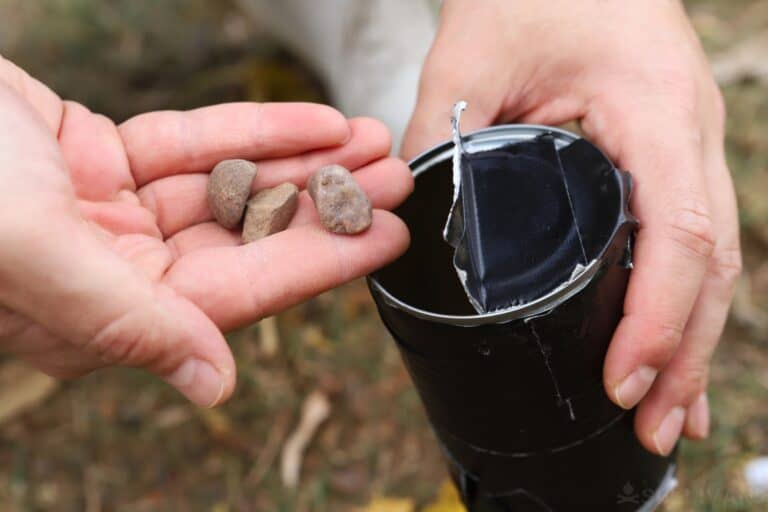
Step 11: close lids. Fold the lids back down so the marbles don’t spill or fly out when the alarm is activated.
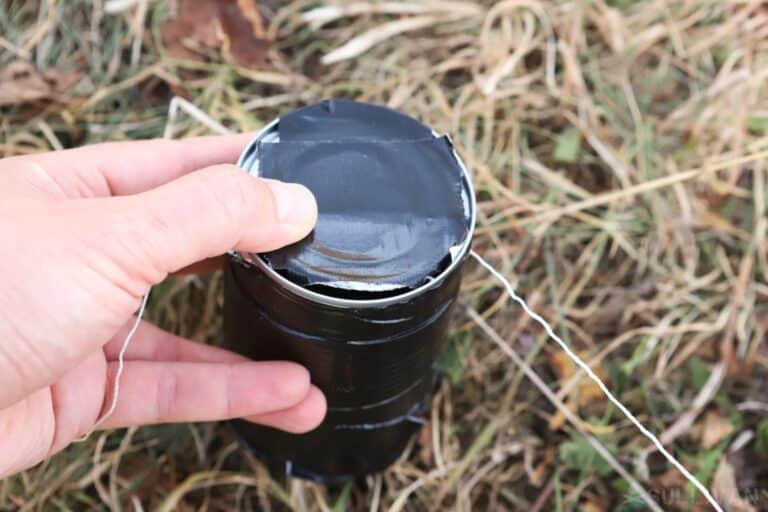
Step 12: test it. Give each of your cans one good shake and see how they sound. They might make more noise by removing marbles to make more room, or by adding a couple of extra. Remember, more racket is better in this case!
Step 13: anchor opposite end of fishing line. When you’re happy with your setup, securely tie off the other end. Remember to keep your cans about 2 to 2 1/2 feet off the ground. You want the line to be mostly taught, but not bow string tight; if it has a little bit of slack it will allow the cans to bounce and make even more noise when disturbed.
Step 14: test it one more time. Give the fishing line a good jolt and see how it sounds. Remember that ideally a human or animal will blunder into this line unawares, shaking the line and causing a huge commotion from the marbles inside the cans.
If it doesn’t seem like the system is making much noise, try decreasing or increasing the tension on the line until you get it just right.
Step 15: finished! Your tin can alarm is in place and is always activated so long as the line is securely tied.
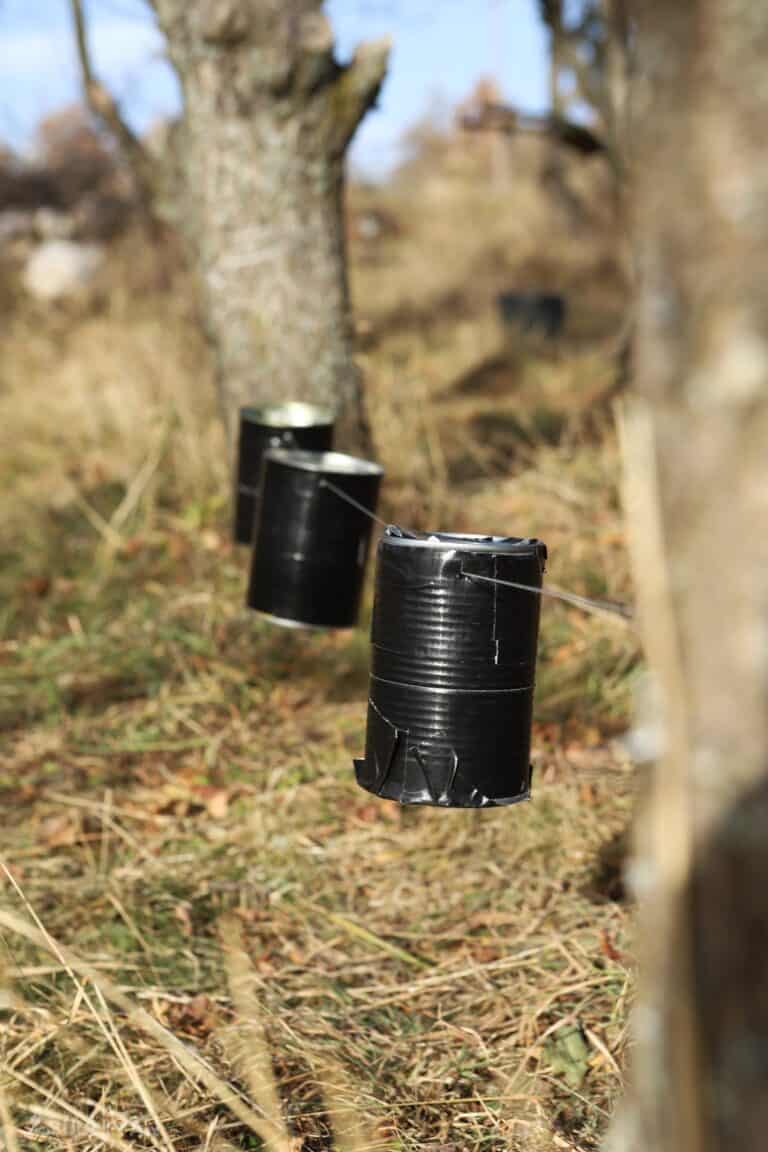
Not much to it. It takes a lot longer to prepare the cans than it does to actually load and place your alarm system here. The great thing about this kind of alarm is that it can be easily improvised using the most common materials, even from garbage you might find out in nature.
Tips for Setting Up and Using Your Alarm
- Assess your alarm after nightfall. If the cans or the line are obviously noticeable, people and perhaps animals might be able to avoid it. Reposition or place secondary alarms as necessary.
- Don’t overload the cans. The temptation is to put more marbles or pebbles into each can, but this will only serve to make the cans heavier and reduce the space that each has to bang into the can and to each other, lowering the overall amount of noise and efficiency of the alarm.
- Remove marbles from cans for transport. If you don’t want to be listening to an awful clatter while you’re hiking, simply remove the marbles from the cans when you stow the alarm and replace them when you set it back up.

[ad_2]
Source link
Get more stuff like this
in your inbox
Don't Be Left Unprepared
Thank you for subscribing.
Something went wrong.


